13.5 Plants, Trees & Fields
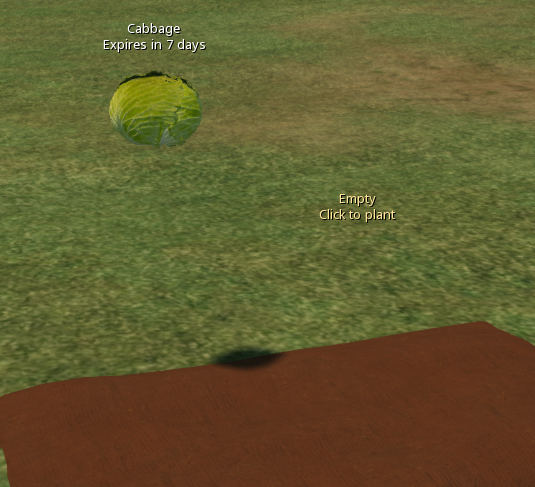
Plants are items that grow over time, going through the stages of empty, new, growing and ripe (and also dead). They need water to grow and can be speeded up by applying manure. Typically plants are things like trees, fields, planters etc. but could also be used in animals and other items! Plants produce a single crop but can also be configured to produce by-products such as wood, leaves, branches, roots etc.
The appearance of the plant during the various stages can be controlled either by different textures or by prims.
Prim plants and by-products are new features not found in earlier versions of the system.
(a) Texture based plants
These consist of the contents prim and a prim named Foliage. You may also have other prims for soil, trunks etc.
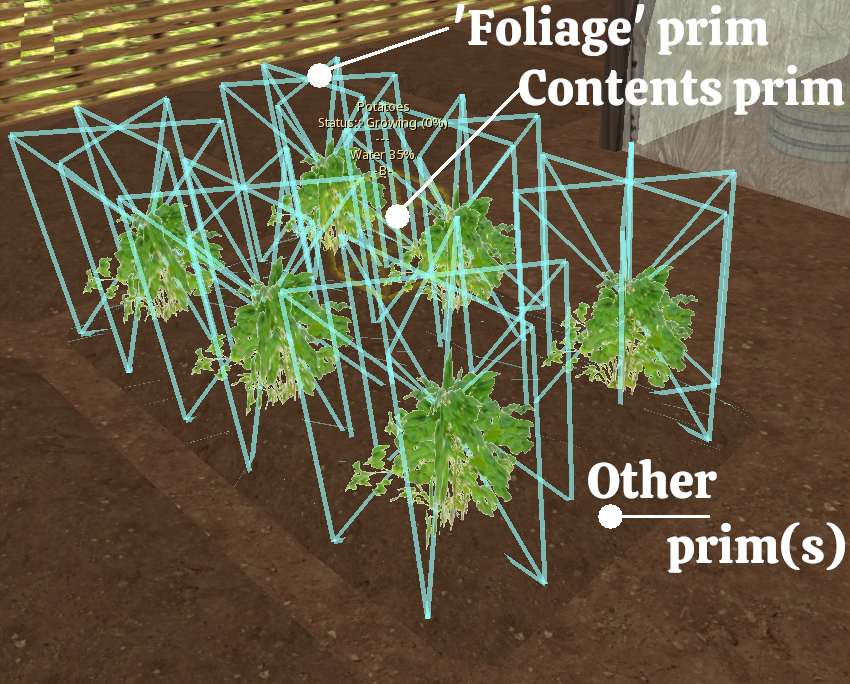
With nothing planted the foliage prim is set to 100% transparency, then during each growing stage instead of transparency, a texture is applied to the prim that corresponds to the growth stage. As an example if the crop is Lettuce, the textures used will be called Lettuce-New, Lettuce-Growing and Lettuce-Ripe (note that the capitalisation is important!)
Adding a new crop to an existing plant
Probably the easiest way to create a new harvest product is by adding it to an existing plant (such as a field, plater etc.) Note that the maximum number of plants in any item (tree, field, planter etc.) is 11 so we shall start with the SF Small Field and turn it into a new item we will call SF Vegetable Field and we shall add in cabbage as a new crop.
First we rename the SF Small Field to SF Vegetable Field and remove some of the existing crops to make way for our new one (since this will be a vegetable field we remove Pot, Strawberries, Sugar Cane and Tea) by deleting from the contents:
SF Pot, SF Strawberries, SF Sugar Cane, SF Tea
Pot-New, Pot-Growing, Pot-Ripe
Strawberries-New, Strawberries-Growing, Strawberries-Ripe
Sugar Cane-New, Sugar Cane-Growing, Sugar Cane-Ripe
Tea-New, Tea-Growing, Tea-Ripe
We also need to remove these from the config notecard and at this point we can also add in our Cabbage:
# List of plant names available (no SF prefix)
PLANTLIST=Aubergines,Cabbage,Carrots,Lettuce,Onions,Peppers,Potatoes,Tomatoes
# List of corresponding products
PRODUCTLIST=SF Aubergines,SF Cabbage,SF Carrots,SF Lettuce,SF Onions,SF Peppers,SF Potatoes,
SF Tomatoes

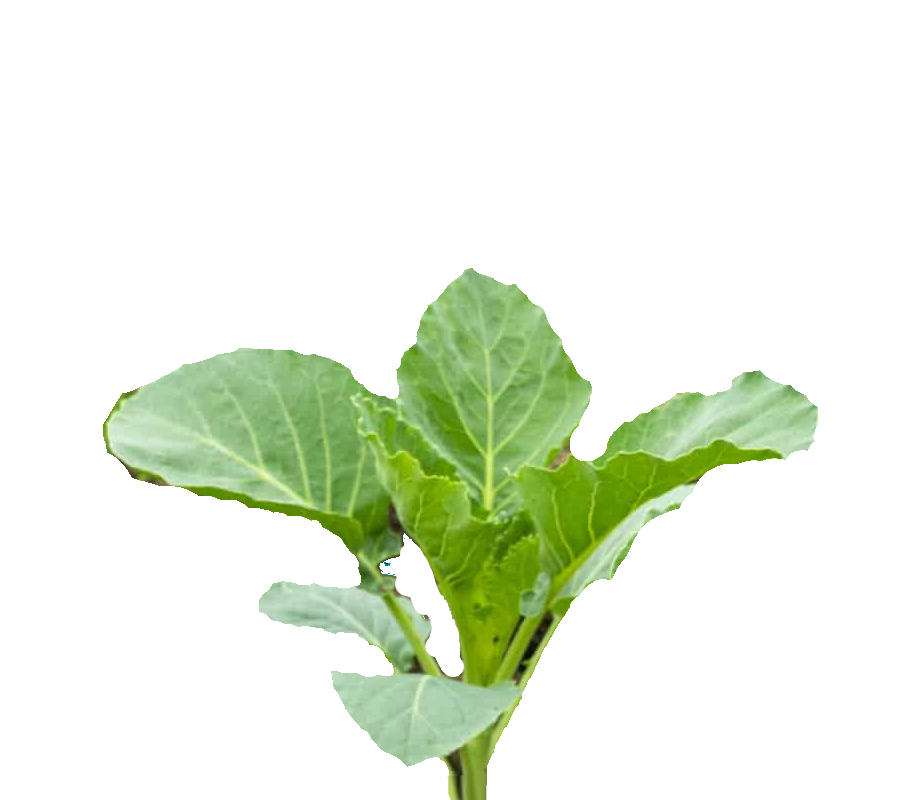
So now we are set up ready to add our cabbage plant and crop. In order to add it we need three textures and a product. The textures should be named to match the entry in the PLANTLIST and followed by -New, -Growing, -Ripe, so for this it will be Cabbage-New, Cabbage-Growing, Cabbage-Ripe Our product (the item that is rezzed when you harvest) is SF Cabbage
For creating the product, refer to that section of the guide. One easy way to make a new product is to just use one of the existing crop buckets and change the name and texture in the bucket but of course you can make the product however you like!
For creating textures, this can often be the hardest part of creating a new plant, especially if you are careful to only work with images that are in the public domain so as to avoid infringing any copyright! Websites such as https://www.textures.com and http://texturer.com can be useful.
It is best to make the three images all the same dimensions so you can best scale them. The images should use transparency so you will need to save them as PNG rather then JPG files.
 |
 |
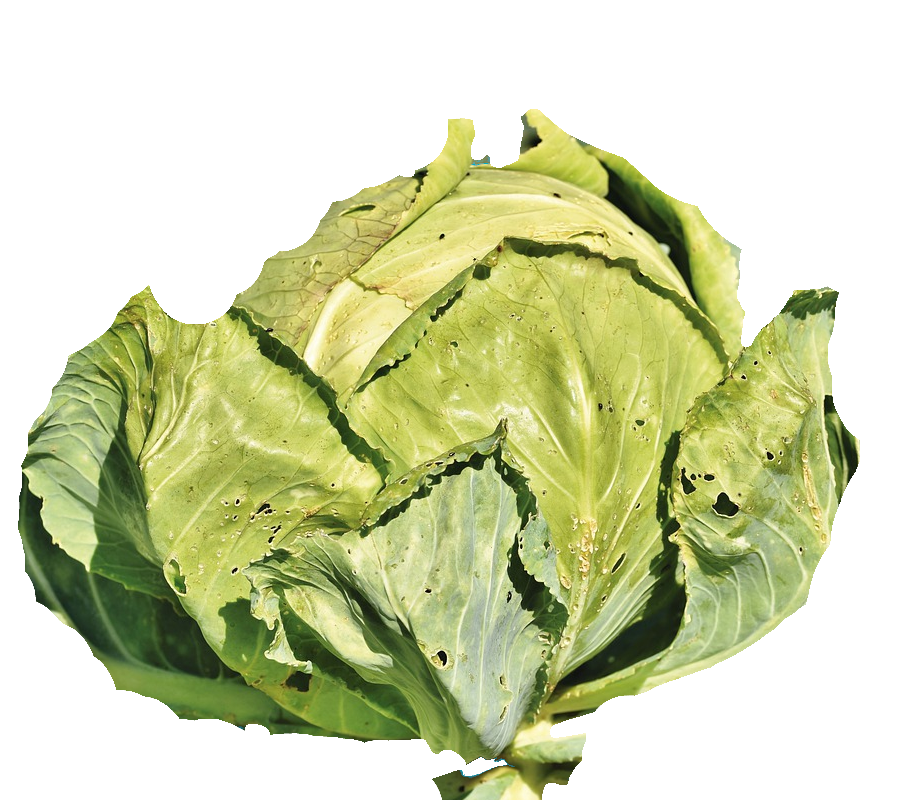 |
| Texture Cabbage-New | Texture Cabbage-Growing | Texture Cabbage-Ripe |
Our SF Cabbage (mesh)
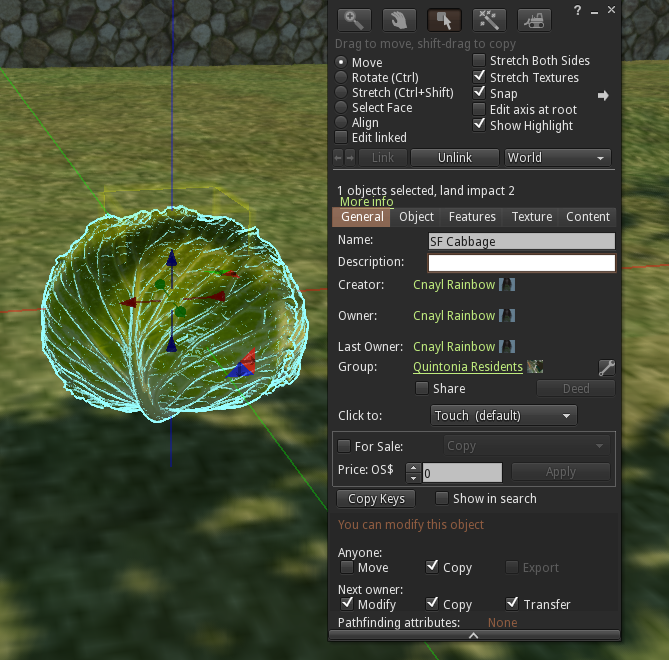
We add the three textures and the SF Cabbage into the fields contents and just to make sure everything takes, we delete any text in the fields Description and do a Reset Scripts
We should now have an empty field ready to test. Click the field and select the Plant button and hopefully you will see Cabbage listed as one of the options. If not, re-check the config notecard.
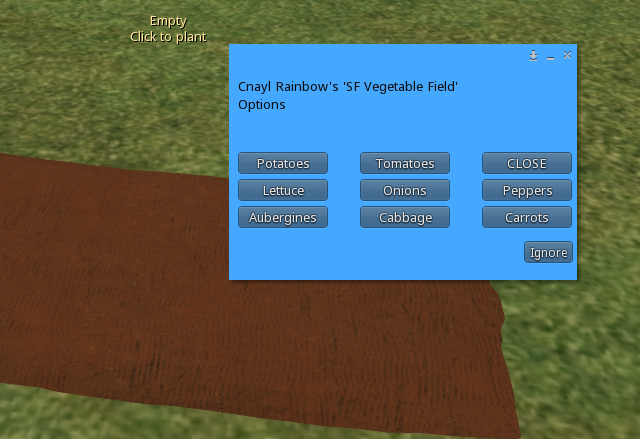
 Select to plant your new item (in this case, Cabbage) and you can see how it looks in the ‘New’ stage.
Note that if you don’t see the plant texture check how your textures are named. It is important that they follow the correct upper/lower case. If for example we had called the texture Cabbage-new or cabbage-new or cabbage-New etc. then it won’t work.
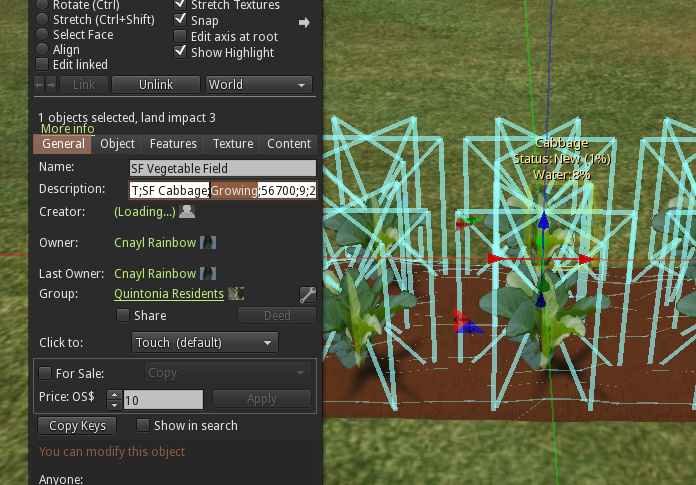
To see how the plant looks in the Growing and ripe stages, rather than having to wait we can use a ‘cheat’ to move things on quickly!
Edit the field and in the description you should see it says something like
T;SF Cabbage;New;56700;9;2;Cabbage;-1987831;0;en-GB
All you need to do is change the word New to Growing and then reset the scripts and the plant will move to the growing stage after a second or two.
Repeat the above but this time change Growing to Ripe and when you reset the scripts the plant will move to the ripe stage.
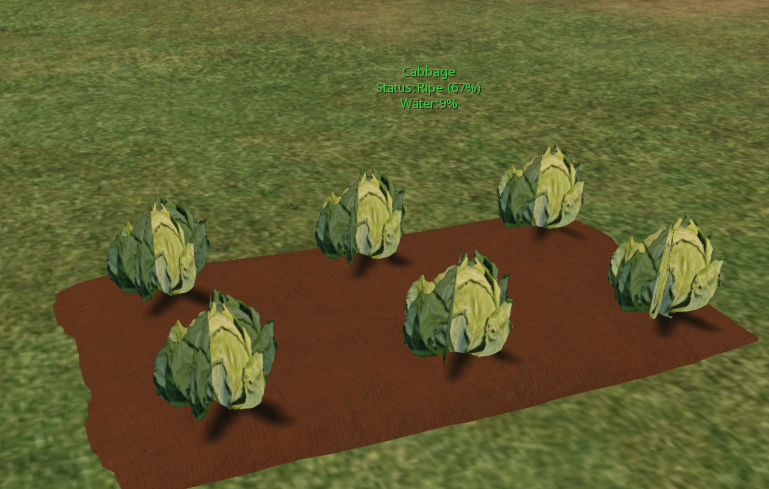
Finally you can click to harvest to check your new crop is rezzed okay and the field goes back to Empty.